Baitcasting reels are designed to cast baits such as lures or jigs. They are also known as spinning reels because they spin around the line instead of pulling it out. To avoid line twists and future maintenance concerns, it’s crucial to know how to spool a baitcasting reel properly.
Compared to other types of fishing reels, baitcasting reels are often more compact and lightweight. They are suitable for anglers who fish from boats or shorelines.
Two main styles of spooling a baitcaster are fixed-spool and free-spool. Between these two categories, the distinction is whether the spool rotates freely or is attached to the handle. If you want to learn how to spool a baitcaster reel, read on.
List of Equipment
Before spooling a baitcasting reel, it is important to have all the necessary tools and gears that will be needed in this procedure. I will explain them one by one.
- Spooling Reel
- Line (monofilament or braided)
- Handle
- Rod
- Bait
- Hook
- Float
Spooling reel
The first step of how to spool a baitcasting reel is to get a spooling reel. A spooling reel is a type of fishing reel that uses a spool to hold the line. A spooling reel is commonly referred to as a “baitcasting” reel. You will need to buy a spooling reel if you want to learn how to line a baitcaster.
Line
The line is the material that is wound around the spool. When you purchase a spooling reel, you will have a choice between monofilament and braid. Monofilament is stronger than braided lines, but it is more expensive.
A braided line is cheaper, but it is weaker than monofilament. If you plan on using your spooling reel to catch fish, then you should use a braided line.
Handle
A handle is the part of the spooling reel that holds onto the line. There is no way you can cast without a handle. A split-handle design is preferred by most individuals. It is where the handle splits into two parts. One half of the handle is attached to the spool while the other half is attached to the rod.
Rod
Rod is the part of the fishing reel that attaches to the handle. Rods come in different lengths and diameters. The diameter of the rod determines how much weight the rod can hold. For smaller fish, lighter rods are preferable to heavier rods, and vice versa for larger fish.
Bait
Bait is the food that the fish eat. There are numerous shapes and sizes of the bait. Fish love to eat worms, insects, and small crustaceans.
Hook
A hook is a tool that attaches to the end of the line. Just like bait, hooks are also available in different types and sizes with a treble hook and double hook being the most popular ones.
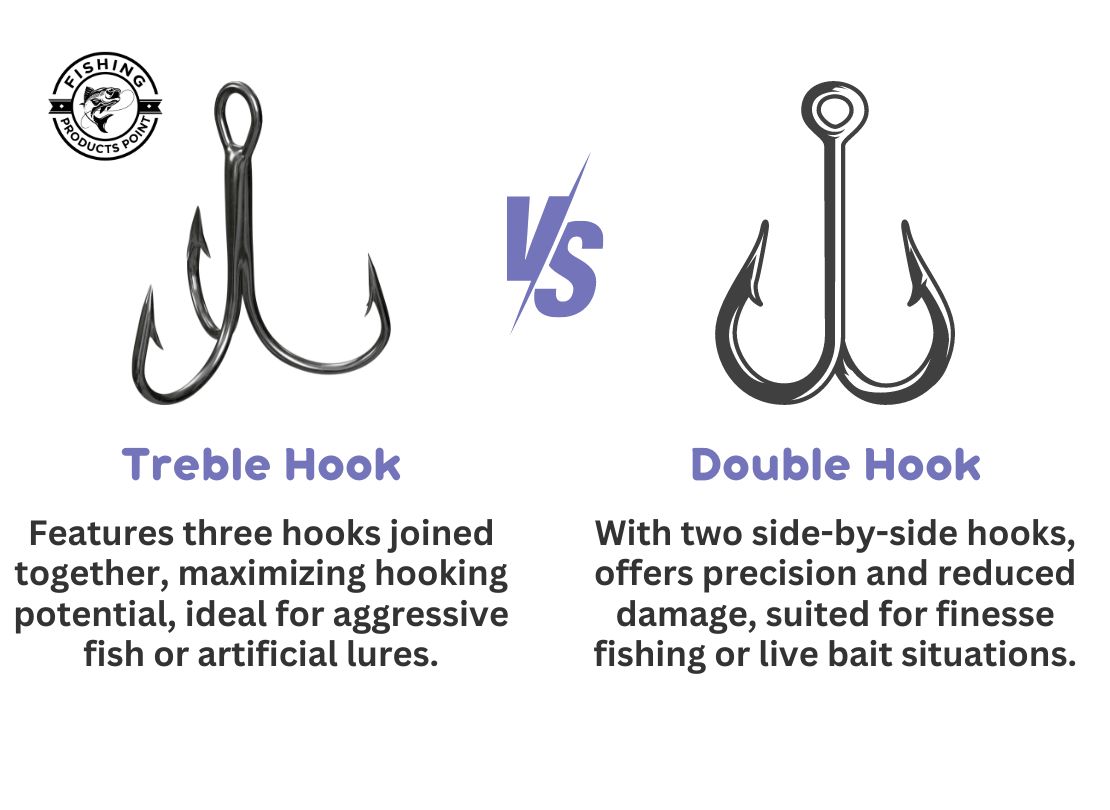
Treble hooks are longer than double hooks, but they are easier to attach to the line. Double hooks are shorter than treble hooks, but they are harder to attach to the line because they require more force.
Float
The flotation device prevents the hook from sinking to the water’s surface. Floats come in many forms, including lead weights, sinkers, and bobbers. Lead weights are the most commonly used floats.
Sinkers keep the float above the surface of the water, while bobbers keep the hook below the surface of the water.
How to put a line on a Baitcaster
If your reel is a baitcaster, you must pass the line through the line guide (a little hole on the front of the reel) before you can tie the line around the spool.
The Arbor Knot
For tying the line around the spool, I advise you to use the arbor knot. It is an ideal kind of fishing knot for this purpose.
It is a very straightforward knot that just uses two overhand knots. But the trickiest element is having to tighten the interior knot slowly enough to let the line slip but quickly enough to create friction.
Keeping the Tension
The most crucial action you can take while spooling a reel is to keep the line taut as you reel it in. If you do it wrong, your spool will have loose loops all over it, which could have a lot of serious consequences.
Step by Step on How to Spool a Baitcasting Reel?
Step 1 – Calculate the Line
The first thing you need to do before starting any fishing is to get your line ready. You want to make sure that you have enough lines on your reel to reach the fish you plan on catching.
If you don’t have enough lines, then you won’t be able to cast out the distance necessary to catch your fish. To determine if you have enough lines, simply measure the length of your rod. Afterwards, double that amount by the reel’s diameter. You will require that many lines.
Step 2 – Spooling Reel
The next step to spooling a baitcasting reel is to remove the old line from the spool. Simply pull out the outdated line until it disengages from the spool to accomplish this.
Once the old line is removed, take the spool apart and clean it thoroughly. If the spool has been sitting around for a while, it may have some gunk stuck to it. You should clean it thoroughly before reassembling it.
Step 3 – Line Selection
Once the spool is cleaned, you need to select the right type of line for your application. Fishing lines come in a variety of varieties, including braided and monofilament. There are benefits and drawbacks to each.
When choosing a line, consider the length of time you plan to use the reel, the size of fish you intend to catch, and the conditions under which you will be using the reel.
Lines made of fluorocarbon or monofilament can be tied straight to the spool. However, in the case of a braided line, it is slightly different. It could slip if it is directly fastened to the spool.
Therefore, the spool must have adequate support to prevent the braid from slipping. Another choice might be to wrap the braid with a tiny piece of electrical tape. It will function equally well.
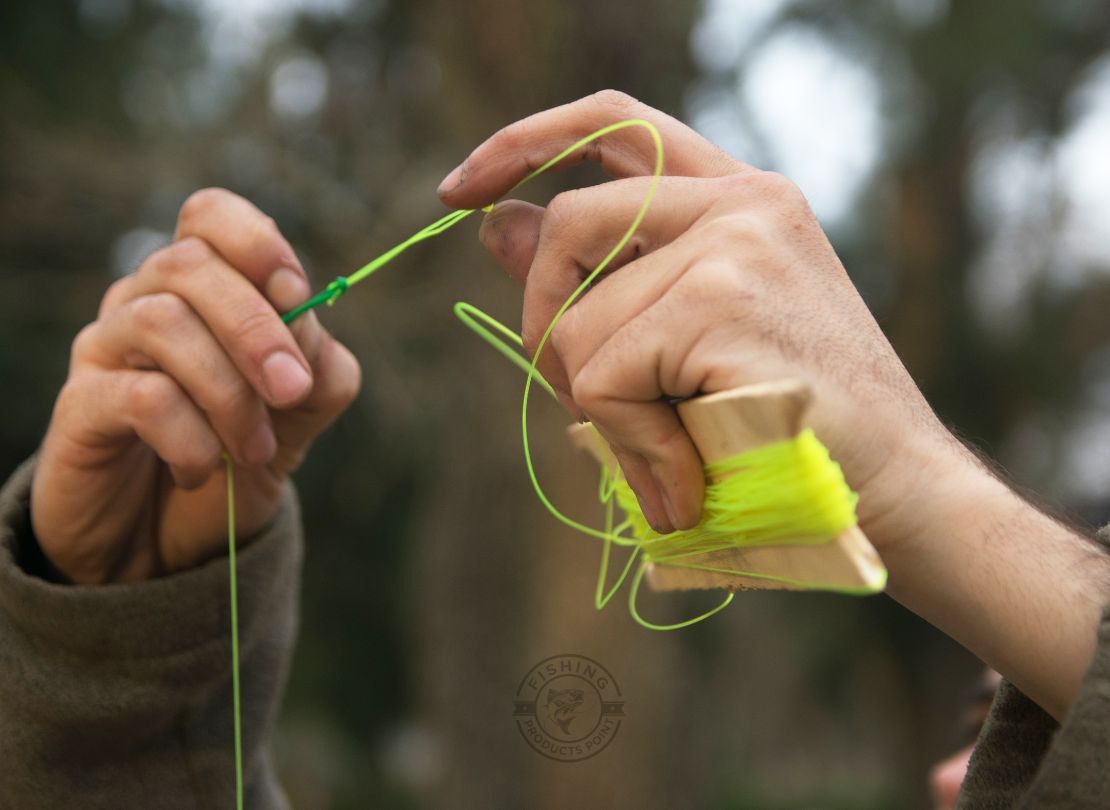
Step 4 – Winding Line
Start where the line ends and wrap it counterclockwise around the spool to wind the line onto the spool. Make sure not to over-wind the line; if you do, the line will become loose and could potentially break. After winding the line, make sure to tighten the line down by pulling it taut.
Step 5 – Tension Adjustment
After winding the line onto the spindle, you need to adjust the tension. To do this, loosen the line slightly and then re-tighten it. Continue adjusting the tension until the line feels tight enough.
Too much tension will cause the line to snap back and forth between the spool and the drag mechanism. Too little tension will allow the line to slip through the spool and drag mechanism.
Step 5 – Drag Mechanism
The drag mechanism is where the tension is applied to the spool. To adjust the drag, crank the knob in a clockwise direction until the required level of tension is reached. Too much tension will result in the line snapping back and forth between the drag and spool. Too little tension will result in the spool spinning freely without any tension being applied.
Step 6 – Handle
The handle is the part of the reel that holds the line and controls the direction of rotation. Put a pin in the handle’s centre hole, then thread a line through it to attach the handle. Then, push the pin through the hole on the opposite side of the handle. Finally, tie the line to the handle.
Step 7 – Finishing Touches
The work must be finished by cutting the line at the filler spool after continuing to spool the reel until the line is filled up to one-eighth of an inch below the top of the spool.
Once done, check the line for knots and tangles. If necessary, untangle the line and trim away the excess line.
Choose your lure, then head to your preferred fishing location once your baitcaster is loaded with a new fishing line and your setup is ready.
Conclusion
The purpose of this article was that if you want to learn how to line a baitcaster then you should first understand how to do it correctly.
You need to know what type of line you have and what size spool you need. Then, you must be aware of the right rod and reel setup. After completing these steps, you can begin learning how to spool a baitcasting reel.


