For those who are new to fishing or are looking to improve their fishing game, knowing how to use a fish finder can be a game-changer. Not only does it help you locate fish, but it also gives you a better understanding of the underwater environment.
Fish finders are an essential tool for any angler seeking to raise their likelihood of landing fish. It can provide information about the depth of the water, the temperature, and the structure of the bottom.
However, using a fish finder can be overwhelming at first, with all the buttons and settings. In this post, we will provide you with a systematic guide on the usage of a fish find effectively and efficiently. Take a pen and paper, and let us get started!
How to Use a Fish Finder?
The use of a fish finder to locate the fish can be done effectively by following simple steps.
Step 1: Install the Fish Finder
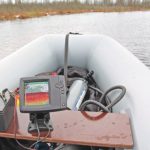
The first step in using a fish finder is to install it on your boat. Mount the transducer on the bottom of your boat by adhering to the manufacturer’s instructions. Make sure that it is securely attached and stationary when in use.
Following that, the transducer emits sonar waves, which are reflected off water-based objects and returned to the fish finder. The fish finder then shows the fish’s location on the screen.
Step 2: Turn on the Fish Finder
Once you have installed the fish finder, turn it on and adjust the settings to suit your needs. You can adjust the sensitivity, depth range, and color scheme of the display. The sensitivity controls how much detail the fish finder displays. While the depth range controls the maximum depth that the fish finder can detect.
You will also want to set up alarms so that they sound off whenever there is something detected by your device. By doing this, you avoid missing any potential catches.
Step 3: Interpret the Display
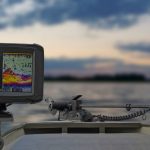
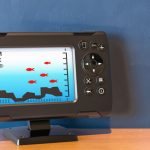
The fish finder display shows the location of the fish in the water. The fish appears as icons or symbols on the screen. Moreover, the size of the icon indicates the size of the fish, while the color indicates the strength of the sonar return. A red or orange color indicates a strong return, which means that there is a fish in that location.
When this happens, stop moving and drop anchor so that you can focus solely on reeling them in! If nothing appears after some time passes by, simply move on to another spot until something does show up again. Just keep repeating this process until all desired catches have been made!
How to use a Fish Finder for Ice Fishing?
Ice fishing is a great way to enjoy the outdoors and catch some fish, but it can be difficult to know where the best spots are. That is why many anglers turn to fish finders for help.
When ice fishing, it’s crucial to focus on the depth of the water. Fish tend to congregate at certain depths, so you will want to adjust the depth range of the fish finder to match the depth of the water you are fishing in.
You can also use the fish finder to locate structures on the bottom of the lake, such as drop-offs or weed beds, which can attract fish.
Steps of Using a Fish Finder for Ice Fishing
Below are the steps where you can easily locate a fish under ice using a fish finder.
Step 1: Choosing a Fish Finder
The first step in using a fish finder for ice fishing is choosing the right one. You want something that will work well in cold temperatures and has enough power to penetrate through thick layers of ice.
Look for models with dual-frequency transducers as they provide better coverage than single-frequency ones do.
Also, make sure it has an LCD so you can easily read what is going on beneath the surface without having to squint at tiny numbers or symbols.
Step 2: Setting up the Transducer
Once you have your chosen model set up, it is time to start scanning the lake bottom below your hole in the ice. Start by setting up your transducer at least 10 feet away from any other metal objects such as lures or jigs since these could interfere with its signal strength and accuracy.
Then adjust its sensitivity settings until you get clear readings of whatever lies beneath. Usually, around 20-30, kHz should do just fine depending on water depth and clarity levels.
Step 3: Display Interpreting
Now comes the fun part. Interpreting what all those lines mean! The most important thing here is learning how different shapes represent different types of structures like rocks, weeds, sandbars, etc.
It will then indicate potential areas where there might be more active feeding activity taking place nearby. It may take some practice before being able to accurately identify these patterns. However, once mastered, it will come naturally after only a few outings out onto frozen lakes.
Step 4: Safety Measurements
Finally, do not forget about safety when using a fish finder while out on icy waters. You should always wear proper clothing including life jackets if necessary and never venture too far away from shore without someone else present who knows exactly where you are at all times.
With these tips in mind plus plenty of patience and practice, soon enough even novice anglers will be catching their limit every time they go out onto frozen lakes armed with their trusty new friend -the Fish Finder.
Conclusion
Using a fish finder does not have to be complicated or overwhelming. With these simple steps outlined above anyone should learn how to use a fish finder. This will able you to identify your favorite fishing spots quickly and easily without too much hassle involved.
So grab your fish finders today and start reaping all those rewards from successful fishing trips tomorrow! Good luck out there anglers – happy hunting!
